We’ve all seen how action movies and TV make it seem that shooting a gun can easily be done one-handed, sideways, and even while diving through the air – all with exceptional accuracy. Hopefully, you realize this is total crap. With gun safety comes proper handling and form. Not only does it keep you safe, but it also improves your precision.
The Golden Rule
Number one rule for all things guns – ALWAYS handle the gun as if it were loaded, even if you think you are 100% sure it is unloaded.
Two Hands Only
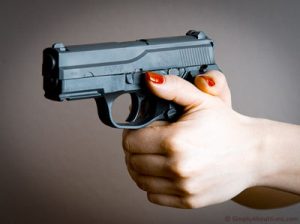
Always use both hands when you are shooting your weapon. You want to use your dominant hand first, placing it on the upper part of the gun you want to grip it with your index finger on one side and your thumb on the other. Your other fingers wrap around the grip and using your non-dominant hand, you grip underneath the weapon. The proper grip gives you full control of the weapon and greatly increases accuracy.
Find Your Stance
Your feet should be shoulder width apart and feet planted firmly into the ground when you are shooting. Don’t lock up your knees, but ensure you are grounded. The three shooting stances are Isosceles, Weaver, and Fighting.
Isosceles
In the Isosceles stance, your body is directly facing the target, legs are shoulder width apart with a slight bend in the knees. Toes are straight, and your arms are straight out in front of you holding the gun. This is one of the more natural stances, but mobility can be limited due to the position of the feet.
Weaver
The Weaver stance perhaps has become one of the most commonly used stances. In this position, your foot on the firing side is slightly behind and the other foot is forward. The firing arm is straight out and your support arm is slightly bent. While this is a commonly used stance, it isn’t always the best. This stance leaves part of your torso exposed, and a number of law enforcement officers have unfortunately been fatally shot while in this stance.
Fighting
The Fighting stance is also recognized as the modified isosceles or weaver, amongst numerous other terms that instructors may use. This stance originated in the military but soon became popular for police officers. In this position, the body is square with the target, and the firing side foot is just behind the supporting foot – Not as wide as the Weaver stance and not parallel like the Isosceles.
Learn more about the different shooting stances.
Best Practices
It’s best to figure out which stance works best for you. There are certainly pros and cons of each, but it really comes down to the shooter and what you are comfortable with. Take the time to get your body comfortable with handling and shooting to the point that it becomes second nature. Practice dry firing in the different stances and see what you like.
As always, if you have any questions, concerns, or are looking to further your education with firearms, contact us at ed@ontargettraining.us or stop by the store at 516 North Bedford Street in East Bridgewater.
Sources
https://gearpatrol.com/2014/02/11/guide-to-life-how-to-hold-and-fire-a-handgun-properly/
https://www.policeone.com/police-products/firearms/training/articles/7981637-The-3-shooting-stances-Which-ones-right-for-you/
auto liker, autoliker, ZFN Liker, Autoliker, Increase Likes, Status Auto Liker, Autoliker, Autolike, Auto Liker, Photo Auto Liker, Autolike International, Photo Liker, auto like, Status Liker, autolike, Auto Like, Working Auto Liker